
NestJS is one of the Node.js frameworks I reach for when a project needs more structure than a small Express application.
For quick APIs, Express or Hono can be excellent. But once a backend starts growing authentication, modules, services, database access, validation, background jobs, integrations, testing having a clear architecture becomes much more valuable.
That is where NestJS works well.
In this tutorial, we will build a small but realistic REST API for managing users. Instead of stopping at a simple GET /users example, we will cover project structure, modules, controllers, services, DTO validation, PostgreSQL integration, error handling, and production considerations.
What We Are Building
Our API will expose the following endpoints:
GET    /api/users
GET    /api/users/:id
POST   /api/users
PATCH  /api/users/:id
DELETE /api/users/:id
A user response will look something like this:
{
  "id": 1,
  "name": "Jay Patel",
  "email": "jay@example.com",
  "createdAt": "2026-07-30T10:30:00.000Z"
}
The important part is not the size of the API. The goal is to build it in a way that still makes sense when the application grows.
Why I Like NestJS for Larger APIs
NestJS is built around modules, controllers, and providers. That separation helps prevent everything from ending up inside route handlers.
HTTP Request
     ↓
Controller
     ↓
Service
     ↓
Repository / Database
     ↓
Response
I prefer this style for medium and large APIs because each layer has a clear responsibility:
- The controller handles routes and request parameters.
- The service handles business logic.
- The repository or database layer handles persistence.
This makes testing, debugging, and maintenance easier as the project grows.
Prerequisites
- Node.js installed
- npm installed
- PostgreSQL available locally or remotely
- Basic TypeScript knowledge
You can verify your Node.js installation with:
node -v
npm -v
Step 1: Install the NestJS CLI
Install the NestJS CLI globally:
npm install -g @nestjs/cliCreate a new project:
nest new nestjs-users-apiMove into the project directory:
cd nestjs-users-apiStart the development server:
npm run start:devBy default, the application runs at:
http://localhost:3000Step 2: Understand the Project Structure
src/
├── app.controller.ts
├── app.module.ts
├── app.service.ts
└── main.ts
The most important file initially is app.module.ts. Modules are used to group related functionality.
In a real project, I normally avoid placing everything inside AppModule. Instead, I separate features into domains such as:
users
auth
orders
payments
notifications
This keeps the application easier to navigate and maintain.
Step 3: Generate the Users Module
nest generate module users
nest generate service users
nest generate controller users
Your users feature should now look similar to this:
src/users/
├── users.controller.ts
├── users.module.ts
└── users.service.ts
For larger applications, I prefer this structure:
src/users/
├── dto/
├── entities/
├── users.controller.ts
├── users.module.ts
└── users.service.ts
Step 4: Create DTOs Instead of Using Raw Objects
One mistake I often see in beginner NestJS tutorials is accepting raw request data directly:
createUser(@Body() user: any)It works, but it gives you very little protection. I prefer using DTO classes and validation.
Create:
src/users/dto/create-user.dto.tsimport {
IsEmail,
IsNotEmpty,
IsString,
MinLength,
} from 'class-validator';
export class CreateUserDto {
@IsString()
@IsNotEmpty()
@MinLength(2)
name: string;
@IsEmail()
email: string;
}Install the validation packages:
npm install class-validator class-transformerNestJS provides a built-in ValidationPipe that can validate incoming request payloads against DTO rules. The official documentation recommends DTO classes because runtime validation relies on class metadata.
Step 5: Enable Global Validation
Open src/main.ts and configure validation globally:
import { ValidationPipe } from '@nestjs/common';
import { NestFactory } from '@nestjs/core';
import { AppModule } from './app.module';

async function bootstrap() {
  const app = await NestFactory.create(AppModule);

  app.setGlobalPrefix('api');

  app.useGlobalPipes(
    new ValidationPipe({
      whitelist: true,
      forbidNonWhitelisted: true,
      transform: true,
    }),
  );

  await app.listen(process.env.PORT ?? 3000);
}

bootstrap();
These options are useful for production-oriented APIs:
- whitelist: removes unexpected properties.
- forbidNonWhitelisted: rejects payloads containing fields you did not allow.
- transform: helps convert incoming values into expected DTO types.
NestJS officially supports all three of these ValidationPipe options.
Step 6: Build the Users Controller
import {
  Body,
  Controller,
  Delete,
  Get,
  Param,
  Patch,
  Post,
} from '@nestjs/common';

import { CreateUserDto } from './dto/create-user.dto';
import { UsersService } from './users.service';

@Controller('users')
export class UsersController {
  constructor(
    private readonly usersService: UsersService,
  ) {}

  @Get()
  findAll() {
    return this.usersService.findAll();
  }

  @Get(':id')
  findOne(@Param('id') id: string) {
    return this.usersService.findOne(Number(id));
  }

  @Post()
  create(@Body() dto: CreateUserDto) {
    return this.usersService.create(dto);
  }

  @Patch(':id')
  update(
    @Param('id') id: string,
    @Body() dto: Partial<CreateUserDto>,
  ) {
    return this.usersService.update(Number(id), dto);
  }

  @Delete(':id')
  remove(@Param('id') id: string) {
    return this.usersService.remove(Number(id));
  }
}
Controllers should stay focused on HTTP concerns. NestJS describes controllers as the part responsible for handling incoming requests and returning responses, while providers such as services handle application logic.
Step 7: Add the Service Layer
For the first version, we will use an in-memory array so the architecture is easy to understand.
import {
  Injectable,
  NotFoundException,
} from '@nestjs/common';

import { CreateUserDto } from './dto/create-user.dto';

@Injectable()
export class UsersService {
  private users = [
    {
      id: 1,
      name: 'Jay Patel',
      email: 'jay@example.com',
    },
  ];

  findAll() {
    return this.users;
  }

  findOne(id: number) {
    const user = this.users.find(
      (item) => item.id === id,
    );

    if (!user) {
      throw new NotFoundException(
        `User ${id} not found`,
      );
    }

    return user;
  }

  create(dto: CreateUserDto) {
    const user = {
      id: Date.now(),
      ...dto,
    };

    this.users.push(user);

    return user;
  }

  update(
    id: number,
    dto: Partial<CreateUserDto>,
  ) {
    const user = this.findOne(id);

    Object.assign(user, dto);

    return user;
  }

  remove(id: number) {
    const user = this.findOne(id);

    this.users = this.users.filter(
      (item) => item.id !== id,
    );

    return {
      message: 'User deleted successfully',
      user,
    };
  }
}
The important part here is using NestJS exceptions such as NotFoundException instead of manually creating inconsistent error objects.
Step 8: Test the API
Start the server:
npm run start:devCreate a user:
curl -X POST http://localhost:3000/api/users \
-H "Content-Type: application/json" \
-d '{
  "name": "Amit Shah",
  "email": "amit@example.com"
}'
Get all users:
curl http://localhost:3000/api/usersTry sending invalid data:
{
  "name": "",
  "email": "wrong-email"
}
The API should now reject the request with a validation error instead of silently accepting bad input.
Move from Memory to PostgreSQL
An in-memory array is useful for learning, but it disappears whenever the server restarts. For a real application, we need persistent storage.
In this example, we will use PostgreSQL with TypeORM.
npm install @nestjs/typeorm typeorm pgStep 9: Create the User Entity
Create src/users/entities/user.entity.ts:
import {
  Column,
  CreateDateColumn,
  Entity,
  PrimaryGeneratedColumn,
} from 'typeorm';

@Entity('users')
export class User {
  @PrimaryGeneratedColumn()
  id: number;

  @Column({ length: 100 })
  name: string;

  @Column({ unique: true })
  email: string;

  @CreateDateColumn()
  createdAt: Date;
}
Step 10: Configure PostgreSQL
I do not recommend hard-coding database credentials directly inside app.module.ts.
npm install @nestjs/configCreate a .env file:
PORT=3000

DB_HOST=localhost
DB_PORT=5432
DB_USERNAME=postgres
DB_PASSWORD=your_password
DB_DATABASE=nestjs_api
Then configure TypeORM:
import { Module } from '@nestjs/common';
import { ConfigModule } from '@nestjs/config';
import { TypeOrmModule } from '@nestjs/typeorm';

import { UsersModule } from './users/users.module';

@Module({
  imports: [
    ConfigModule.forRoot({
      isGlobal: true,
    }),

    TypeOrmModule.forRoot({
      type: 'postgres',
      host: process.env.DB_HOST,
      port: Number(process.env.DB_PORT),
      username: process.env.DB_USERNAME,
      password: process.env.DB_PASSWORD,
      database: process.env.DB_DATABASE,
      autoLoadEntities: true,
      synchronize: false,
    }),

    UsersModule,
  ],
})
export class AppModule {}
I intentionally use synchronize: false. NestJS’s database documentation warns against using synchronize: true in production because automatic schema synchronization can put production data at risk.
Step 11: Register the User Entity
import { Module } from '@nestjs/common';
import { TypeOrmModule } from '@nestjs/typeorm';

import { User } from './entities/user.entity';
import { UsersController } from './users.controller';
import { UsersService } from './users.service';

@Module({
  imports: [
    TypeOrmModule.forFeature([User]),
  ],
  controllers: [UsersController],
  providers: [UsersService],
})
export class UsersModule {}
Step 12: Replace the Array with a Repository
import {
  Injectable,
  NotFoundException,
} from '@nestjs/common';

import { InjectRepository } from '@nestjs/typeorm';
import { Repository } from 'typeorm';

import { CreateUserDto } from './dto/create-user.dto';
import { User } from './entities/user.entity';

@Injectable()
export class UsersService {
  constructor(
    @InjectRepository(User)
    private readonly userRepository: Repository<User>,
  ) {}

  findAll() {
    return this.userRepository.find({
      order: {
        id: 'DESC',
      },
    });
  }

  async findOne(id: number) {
    const user =
      await this.userRepository.findOne({
        where: { id },
      });

    if (!user) {
      throw new NotFoundException(
        `User ${id} not found`,
      );
    }

    return user;
  }

  async create(dto: CreateUserDto) {
    const user =
      this.userRepository.create(dto);

    return this.userRepository.save(user);
  }

  async update(
    id: number,
    dto: Partial<CreateUserDto>,
  ) {
    const user = await this.findOne(id);

    Object.assign(user, dto);

    return this.userRepository.save(user);
  }

  async remove(id: number) {
    const user = await this.findOne(id);

    await this.userRepository.remove(user);

    return {
      message: 'User deleted successfully',
    };
  }
}
Create a Proper UpdateUserDto
Using Partial<CreateUserDto> works, but I prefer a dedicated DTO because it keeps validation and API contracts clear.
npm install @nestjs/mapped-typesimport { PartialType } from '@nestjs/mapped-types';
import { CreateUserDto } from './create-user.dto';
export class UpdateUserDto extends PartialType(
CreateUserDto,
) {}Validate Route IDs Properly
Instead of manually writing Number(id), NestJS provides ParseIntPipe.
@Get(':id')
findOne(
  @Param('id', ParseIntPipe) id: number,
) {
  return this.usersService.findOne(id);
}
That means a request such as /users/abc is rejected before it reaches your service. ParseIntPipe is included among NestJS’s built-in validation and transformation pipes.
Handle Duplicate Email Addresses Cleanly
Because our database uses a unique email column, I prefer detecting duplicates before saving so the client receives a useful response instead of a raw database error.
const existingUser =
  await this.userRepository.findOne({
    where: {
      email: dto.email,
    },
  });

if (existingUser) {
  throw new ConflictException(
    'A user with this email already exists',
  );
}
Recommended API Response Strategy
I normally avoid wrapping every successful response unless the project has a good reason to do so.
This is perfectly reasonable:
{
  "id": 12,
  "name": "Amit Shah",
  "email": "amit@example.com"
}
You do not always need:
{
  "success": true,
  "status": 200,
  "data": {
    ...
  }
}
Response envelopes can be useful when you need pagination metadata or standardized frontend contracts, but they should solve a real problem rather than add unnecessary nesting.
Production Mistakes I Would Avoid
1. Putting Business Logic in Controllers
Controllers should remain thin. Database queries, email logic, validation workflows, and business rules belong in services or dedicated components.
2. Accepting Any Everywhere
@Body() body: anyDTOs and validation exist to protect the boundary of your application. Use them.
3. Hard-Coding Secrets
Database passwords, JWT secrets, API keys, and third-party credentials should never be committed directly into your source code.
4. Returning Raw Database Errors
Your clients should receive meaningful HTTP errors, not internal PostgreSQL or TypeORM messages.
5. Using synchronize: true in Production
Use migrations for controlled database changes. NestJS explicitly warns against production use of automatic TypeORM schema synchronization.
6. Forgetting Pagination
A route returning 20 records is easy. A route returning two million records is a production incident waiting to happen.
GET /users?page=1&limit=207. Logging Sensitive Information
Avoid logging passwords, access tokens, refresh tokens, complete authorization headers, or unnecessary personal information.
What I Would Add Next
- JWT authentication
- Refresh tokens
- Role-based authorization
- Database migrations
- Pagination and filtering
- Swagger/OpenAPI documentation
- Unit tests
- Integration tests
- Rate limiting
- Structured logging
- Docker
- CI/CD
- Production monitoring
That is where a basic CRUD tutorial starts becoming an API you can confidently maintain in production.
NestJS vs Lighter Frameworks
I do not think NestJS is automatically the best choice for every Node.js backend.
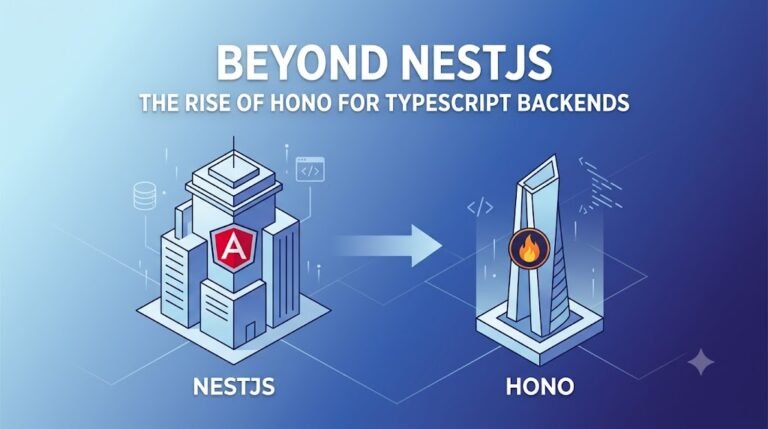
For a tiny microservice, edge function, or lightweight API, I may prefer something smaller such as Hono. For larger applications with multiple modules and developers, however, NestJS provides architectural conventions that can prevent the codebase from becoming difficult to maintain.
If you want to understand that trade-off in more detail, read my NestJS vs Hono comparison.
Final Thoughts
Building a REST API with NestJS is easy. Building one that remains understandable after months of feature development is the harder part.
The structure I recommend is simple:
Controller
→ Service
→ Repository
→ Database
Then gradually add validation, configuration, migrations, authentication, testing, logging, and monitoring as your project matures.
If you are learning NestJS, build the simple version first. Once you understand how modules, controllers, providers, and dependency injection fit together, replace the in-memory storage with PostgreSQL and add production concerns one at a time.
That progression will teach you much more than copying a large starter repository without understanding why each abstraction exists.